Testing Guitar Tone Capacitors, Part 2: Four Black Beauties, a 1930s Sprague, and Deconstructing a Bumblebee


    In Part 1, we made a guitar tone capacitor testing rig, and auditioned some caps.  In this installment, we'll audio test a few more caps, and also have fun taking apart and studying the construction of one the most iconic tone caps of all time, the famed paper and foil in oil Sprague "Bumblebee".  Speaking of which, although most everyone today calls that type of capacitor "Paper In Oil", we can see by looking at the above scan from Sprague's vintage literature, that they were originally termed an "Extended-Foil Paper Capacitor", when they were being manufactured.

Deconstructing a Bumblebee

First thing, let's smash a Bumblebee.  Here's a small hive of 'Bees:


We'll take an already dead Bumblebee, crack open the outer casing, and unroll the foil and paper inside:


Well, that's it!  Hope that was fun for you, too.  Thanks to David in Massachusetts for the use, and abuse of, a vintage Sprague Bumblebee.

Testing tone capacitors, Part 2

Now, let's get back to tone testing some capacitors.

At this moment, we have no live Bumblebees to audition, but we do have four of the Sprague capacitors now known as "Black Beauties", and an ancient .1uF Sprague "600 Line" cap from the 1930s.

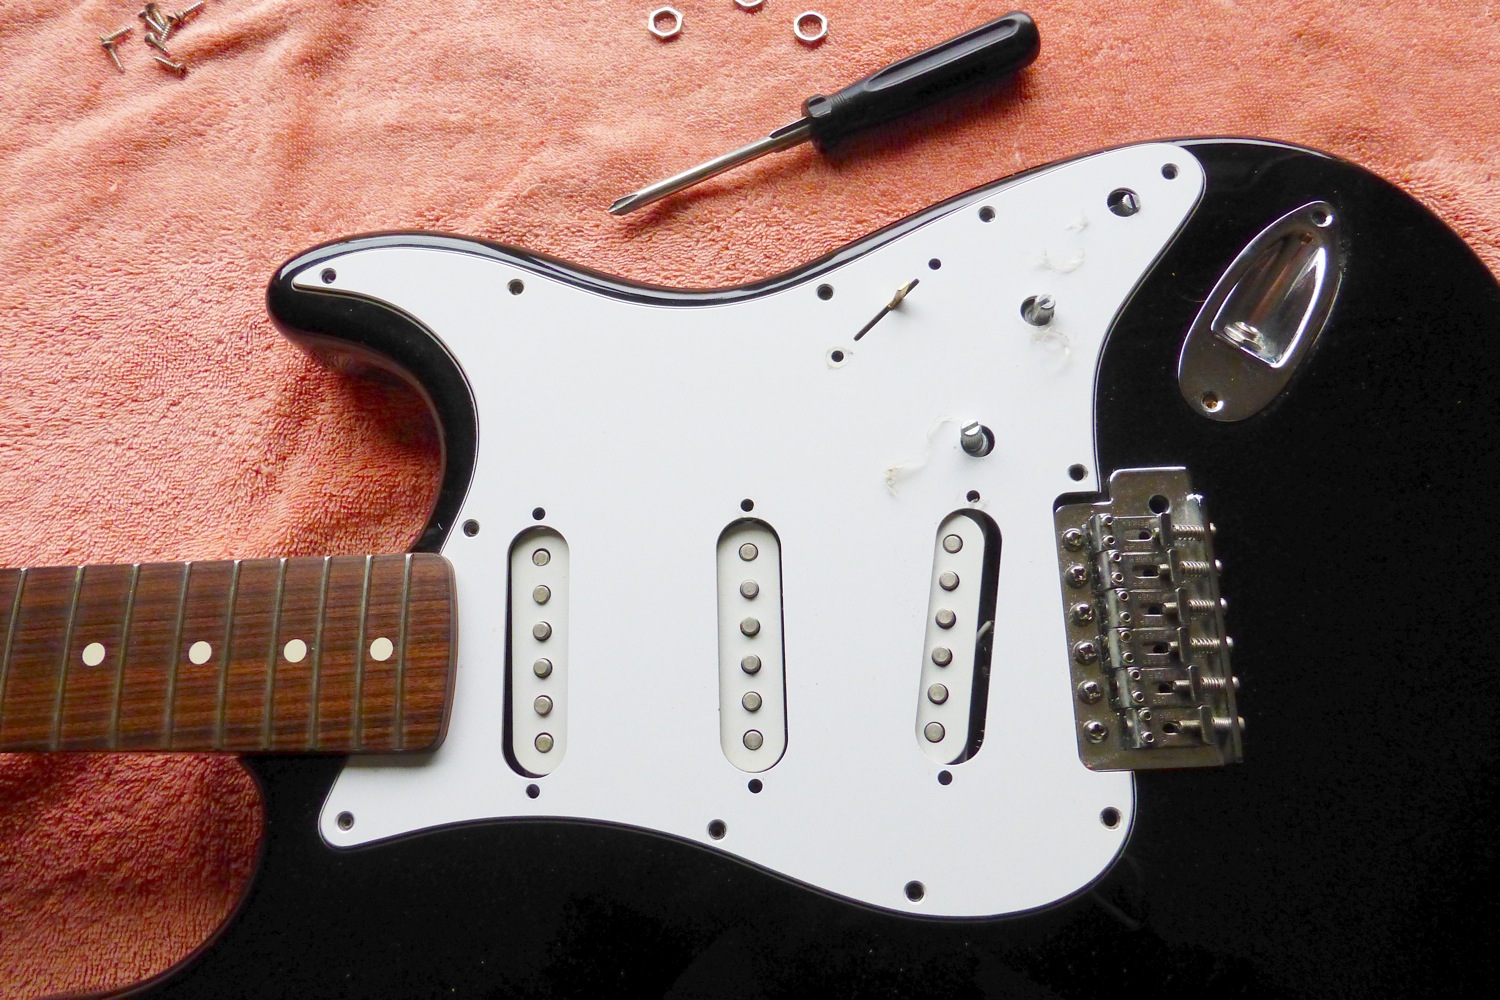
Here's what we're going to use for doing real time audio testing of various tone capacitors:


The Strat Parts-O-Caster has a mid '90s Fender MIJ body, a '91 MIM neck, Classic Vibe pickups, mostly Japan-made bits and pieces, and currently has no tone control, but it's looking for a nice tone capacitor to settle down with.

The amp is a completely rebuilt 1954 Conn organ amp chassis, rewired with a slightly altered late '50s 5E5 Pro circuit.  Like the Strat, this amp also has no tone controls, and just one volume knob.

The speaker cab is a 1960s Pioneer hi-fi cabinet (solid core plywood, real wood veneer), converted to semi-open back, and the driver is a '70s Cerwin Vega ER124 12" instrument and PA speaker.

Here's the home brew capacitor testing jig - see Part 1 for a complete description:


Also, we're only doing straight up audio testing - no capacitance meter measurements, no getting into the pros and cons of various materials, types of construction, manufacturing dates, or any intangible metaphysical or magical tonal properties, no unicorns or faery dust.  Simply put, how does whatever cap being tested interact with a guitar pickup, through an amp - how does it sound?

Prior to each of the separate cap tests, I bypassed the test rig and played straight into the amp to get a baseline tone; after plugging back into the test box, I played the same licks, in the same middle pickup position, with no capacitor in the clips, and then again with a cap in place, with the box's pot turned all the way up.  Finally, the test rig's tone pot was swept and audio impressions noted.  In a couple instances, I completely redid a test, just to make certain I hadn't misheard any tonal change.

First up:


Sprague .1uF, "600 Line, .1 MFD, Working Voltage 600V, Tubular Condenser":

- At maximum clockwise rotation of the knob, a small amount of high end roll-off
- Sweeping the pot towards minimum, no tonal change until approximately 1/2 way
- Smooth taper, no wah effect
- Big jazz tones at full counter clockwise, especially with the neck pickup engaged


Sprague .068uF - ".068MF, 10%, 600 VDC, 6TM-S68":

- Very little high roll-off at maximum
- Noticeable roll-off beginning at 3/4 rotation
- Smooth tonal taper, until 1/4 above minimum
- Slight wah effect between minimum and 1/4
- Nice neck pickup jazz tone at minimum
- Works especially well with the bridge pickup, would make a great Esquire tone cap, able to get most any tone between jazz and chicken-pickin' with just the bridge PU


Sprague .022uF #1 - ".022 MF, 10%, 200 V.D.C., 2TM-S22":

- A small amount of high roll-off at maximum clockwise
- Smooth, even high roll-off transition throughout the entire pot rotation
- No wah effect
- At minimum, no real jazz tone, but has a slight fixed wah sound
- Through most of the pot's rotation, a variety of very usable round, sweet tones


Sprague .022uF #2 - ".022 MF, 10%, 200 V.D.C., 2TM-S22":

- More high roll-off at maximum than the previous .022
- Same smooth tonal transition sweep as .022 #1
- A slight wah effect between minimum and 1/4 rotation
- At minimum, more of a "jazz" tone than #1, but not as full-bodied as the .1 and the .068
- As with .022 #1, overall a very usable tone capacitor, capable of some nice sounds


Sprague .01uF, "155P, Met. Paper, .01 MF, 200 VDC":

- Noticeable high roll-off at maximum clockwise
- No change in roll-off until 1/2 way down
- From that point until almost minimum, a very slight amount of roll-off
- Almost like a switch, there is suddenly a change in tone: at full counter-clockwise it's a really interesting, hollow sound, very fixed wah-ish
- No swept wah sound, no jazz tones to speak of

*            *            *

Conclusions:

All these vintage Sprague tone capacitors are usable in their own ways, and some general observations are that larger values have better application as "Jazz guitar" tone caps, the .01uF might be an interesting effect if placed on a switch, and both the .022uF caps would make very usable all-around guitar tone capacitors.

In particular, the "Black Beauty" Sprague .068uF really shines as a do-it-all tone cap for bridge pickup use, would be great for a single pickup guitar such as an Esquire or Les Paul Junior, and I'm definitely keeping it on hand for my next Telecaster project.

Although logic and electronic theory tells us that a capacitor should have no affect on a guitar's tone if the tone pot is turned all the way up, a listening test such as this very plainly shows that's not the case.  Exactly what the electronic mechanism or conditions within an electric guitar's controls are that cause this to happen are unclear, but anyone who's ever played a guitar with and without tone and volume controls installed, knows that it's not imaginary or theoretical.  Without controls, any electric guitar is louder and brighter, sometimes just a bit, and often noticeably more.

There has been a lot of speculation about whether or not certain capacitors contribute a "wah" like effect, with various self-styled experts denying its existence, at times getting very heated about the subject in some on-line forums.  In a future post, we'll visit a couple of those forum threads, learn just how intense the flaming and name calling can get, and have some laughs at the expense of others.  The fact of the matter is that some caps really do have that tonal capability, or at least some part of it, and it's not a glitch, an artifact, or consequence of being too high and having too much fun. 

But first, next time in Part 3, we'll listen to the late great Alvino Rey really giving an electric slide guitar's tone knob a workout; we'll also test a few more tone caps, and if we're lucky, find that one perfect tone capacitor.  Stay tuned!


Merle Haggard, 1937 - 2016


   Merle passed from this world yesterday; it was his birthday, and I'm sure he had a few friends there with him.  He was just that kind of guy.  I only met him once, when I was a lot younger, and he was a real country gentleman, gracious, always had a kind word to say to a stranger, even a tongue tied kid just beginning to find his way around a Telecaster.

I'd known about Merle Haggard the country singing star for a while, heard his songs being done by the Grateful Dead and some other west coast bands, and had jammed on a few of Merle's tunes, for fun.  One night a friend's dad called us into the living room to watch a show on the local public TV station, a 45 minute documentary film chronicling a 1970 musical tour with Merle Haggard and the Strangers.  During that road tour, Merle set out with the idea that he would learn to play the fiddle, find some past members of Bob Will's Texas Playboys band and incorporate them into his group, and rehearse old Playboys tunes in preparation for recording a tribute album to Wills, all done while playing show dates, on the road, over a four month period.  It was riveting TV; we young rocker guys sat there spellbound by Haggard's intensity and dedication to his craft, and in a certain way, it changed my musical life.

For a top 40 country singer, Merle Haggard was unusual for his time; he wasn't a record company's studio creation, and he was never an entertainer.  Onstage, he didn't try to be anything other than what he was, and when he and the Strangers did a show, it was always the real deal, only the music counted, with no added artifice.

With his rugged good looks and his expressive vocal style, Merle could have just coasted along with the Nashville "contemporary country" hit machine, but other voices were calling him.  In 1969, at the height of his popularity, he released the album "Same Train, A Different Time", a tribute to one of country music's earliest stars, Jimmie Rodgers.


Haggard followed that up the next year with his homage to Bob Wills, "A Tribute to the Best Damn Fiddle Player in the World".


The photo at the very top of this post was taken during the 1970 tour, when Merle spent months intently learning to play fiddle, practicing Wills' solos non stop on the tour bus.  Biff Adam, the Strangers' drummer, recalls, "He'd be listening over and over to those tapes - sometimes we'd have to go back in the bunks and cover up our heads!"

Merle did indeed learn to play that damn fiddle, and he only got better.  Over time, always doing numerous tour dates every year with the Strangers, he became increasingly proficient on his fiddle and guitar, and his voice grew more eloquent and emotionally engaging than ever.  When Merle Haggard set himself on the path of following a mostly forgotten American musical form, Western Swing, is the moment when he turned away from being merely a singing star, and started becoming something else, something that for him was a lot more meaningful: a real musician, and that's what he remained for the rest of his life.

Thanks, Merle; because of you, I fell in with a real bad crowd - the hard cases, the unrepentant, the unforgiven: fiddlers, steel guitarists, and worst of all, the Tele pickers.  We played all the great classic Bob Wills tunes, like Faded Love, Take Me Back To Tulsa, Roly Poly, Right Or Wrong, and San Antonio Rose, and we had a hell of a lot of fun doing it.

*            *            *

Here's an early video of Merle Haggard, performing I'm A Lonesome Fugitive, on Buck Owen's Ranch Show in Bakersfield, California, in 1967:


Merle Haggard and the Strangers, in a 1978 Austin City Limits TV show, doing Bob Wills' San Antonio Rose:


Same show, different tune: Orange Blossom Special:


Some former members of Bob Wills' Texas Playboys - Johhny Gimble, Eldon Shamblin, and Tiny Moore, join Merle on Ralph Emory's Nashville TV show to do Cherokee Maiden:


And back to the 1978 Austin City Limits show, for Merle's farewell, a medley of Lonesome Fugitive and Sing Me Back Home:


Love, Geometrically


     π Are Squared,
A young man from Greece named Pythagoras
Was feeling philosophically amorous
To his love he said "I
Have made you a Pi,
Though its form and its function aren't obvious!"

1998 Fender MIM Stratocaster Makeover, Part 2 - Basic Setup


    In Part 1, we did a style makeover of a 1998 Fender MIM (Made In Mexico) Stratocaster, exchanging the original white pickguard, trem plate, pickup covers, and knobs for all new parts - a Fender tortoise pickguard, Allparts "vintage cream" pickup covers and knobs, and an Allparts tortoise pattern tremolo cover.

This time, we'll perform a very basic bridge and neck setup, for a couple of reasons. First, this Strat has been without strings for a while since the plastic bits were replaced, and after new strings are put on, the neck might need a bit of tweaking. This particular guitar played well enough before we started the makeover project, so only minor adjustments, if any, would be needed. If it had any real issues, the setup needed would be beyond the scope of this blog post.

Secondly, we're going to go with a different bridge setup, with the top plate flat against the body instead of the previous floating tremolo. This Strat is going to be a birthday gift for a 16 year old who hasn't owned a guitar yet, and whatever we can do to reduce the usual Stratocaster tuning instability drama, will be a good thing. Of course, we could insert and glue two pieces of wood in the trem cavity to hold the inertia block rigidly in place, but having a non-floating plate, along with four springs all pulled up tight, is quick and easily reversible, and the guitar still has that "sproingy" trem bridge Strat sound. And yeah, some people hate that springy trem tone, but then again some people have sad, ungraceful lives. Why have a Stratocaster if you don't like its characteristic tone?

Unfloat the trem:

First, we'll add another trem spring, going from three to four. It's easy to do with no strings on, while the springs are loose - the middle spring moves over, and another one is added. We could use five springs, sure, but four gets the job done:


Next, the two big screws holding the trem spring claw will be run down a few turns, pulling the springs tighter and holding the bridge plate firmly in place against the top of the guitar body. Then, new strings are put on and brought up to pitch; if the bridge plate starts pulling up off the body at that point, we'll tighten the claw screws again, only just enough to bring the plate back down flat:


On my own Strat, I prefer a floating trem, even though I never use a whammy bar; often, I'll press down on the bridge while playing to add a bit of vibrato, and it's fun to pull up on the back side of the trem plate sometimes to make dive-bombey notes and chords. For someone just starting out on guitar, it's probably better to have the added tuning stability of a non-floating bridge.

String height adjustment:

Now, it's time for a basic neck setup. After the new strings (GHS Gilmour set: .010, .012, .016, .028, .038, .048)) have been on for a couple of hours and the neck has gotten used to string tension again, we'll raise the saddles a bit, since the strings are now probably lower than they were before the bridge top plate was pulled down flat. The saddles on this Strat needed a 1.5mm allen wrench to make the height adjustment:


Depending on how most notes ring truly up and down the fingerboard, I usually set the action on most of my electric guitars to between 1/16" and 5/64" above the 12th fret on the high E string, and somewhere between 5/64" and 3/32" at the low E. Checking at the 12th fret is a habit left from playing acoustic guitar; Fender suggests checking at the 17th fret, with slightly higher height measurements.

1/16" as a starting point at the 12th works for me, but not everyone has the same action preferences, so adjust as needed to suit yourself. Just set the heights approximately at this point - it will probably have to be done again later after the other setup adjustments are completed, and checking while playing every string at every fret.


When the saddles are raised, the string tension will increase and they will rise in pitch somewhat, so re-tune again.

Setting neck alignment:

Now is a good time to check the alignment of the strings relative to the fingerboard and the pickups.


The picture above shows the neck correctly aligned; when we started, the high E string was noticeably closer to the edge of the fingerboard than the low E, so it seemed like a good idea to do a re-alignment. Here's the correct way to do that; it's how everyone aligned Fender necks in the 1950s and '60s, and it was the official, documented method used by the original G & L guitar company (you know, that other guitar manufacturer owned by Leo Fender):

With all strings at full tension, loosen all four neck bolts slightly, but not very much - just enough to be able to move the neck in the neck pocket. The first time you do this, it may take a couple of tries to get just the right amount of looseness, but it's really not difficult. Next, pull the neck sideways until the strings are aligned to your satisfaction, and then tighten up the neck screws again. That's it!  Simple, done!

* Note: I've had a couple "experts" tell me that the above method is somehow wrong, but - if this is how it was done at Leo's factories, but now it's suddenly incorrect in the 21st century, then WTF, you know?

Fingerboard relief:

Now let's make sure the neck has the correct amount of relief, which is a small amount of bow that can help minimize string buzz. You can use a precision straight edge and a set of high quality feeler gauges to check the fingerboard relief, but there's another (cheaper) way that's usually good enough. Let's assume that new strings tuned up to full tension are as good and straight as a well made ruler. Fret any string (I usually use the D string) at the first fret, while at the same time fretting that string with your other hand, at the last fret, and check how much space there is between the top of the 8th fret, and the bottom of the string. Just a small amount of space seems to be correct - if you can see air under the string while checking it, great.

Fender suggests checking on the low E string, placing a capo on the first fret while fretting at the last, and using a .010" feeler gauge. .010" is 1/100 of an inch, the same size as the diameter of most electric guitar high E strings, and that's a very small, but still visible gap between the fret and the string. I like to check relief on each string, and average out the differences. In this case, there was too little relief - the strings were laying on top of the 8th fret - so we needed to back off on the truss rod adjustment nut and reintroduce some relief.

When doing any truss rod adjustment, it's best to be cautious, and take your time doing it. Turn the wrench (or large flat-blade screwdriver in some cases) slowly, don't yank it, and only 1/4 turn at a time. To correct too much bow, turn the truss rod nut clockwise (tighten); to get more fingerboard relief, turn it counter-clockwise (loosen). Only do a 1/4 turn in either direction, and wait a day to see how the neck has taken the adjustment before doing another 1/4 turn. Usually, backing off on the adjustment nut yields quicker results than tightening the nut, but it's always best to give the neck enough time to settle in.

Here's where having a few tools comes in handy: the saddle screws took a metric allen wrench, 1.5mm, and the truss rod nut needed a 3/16" wrench:


This time, only one adjustment was necessary to get a nice amount of relief. Afterwards the action (string heights) was checked again and the saddle heights readjusted. If we're lucky, we won't have to set the action again.

Unwound string break-over angles:

When the Strat was sitting for a day while the truss rod adjustment settled out, I noticed that the E and B string tree was pulled down tight against the headstock, with no spacer under it. Those two strings had a lot more of a break-over angle over the nut than the G string did, even though I had done an old Tele picker's trick: winding most or all of the extra, unused G string around its post (instead of clipping and tossing it), in order to get the 3rd string down a bit:


Strat and Tele string guides used to have spacers factory installed; now it's a hard to find part. I used a roller from a bicycle chain, but there are lots of possibilities - a nut or stack of very small washers, a cut-off piece of small diameter metal tubing, an eyelet, a compressed spring, etc:


The goal here is to try and give the three unwound strings a similar amount of break-over angle past the nut; this seems to help out with tuning stability, especially if you do a lot of string bending. The next picture, of another Strat we have, shows the effect of evening out the breakover angles of the top three strings:


Setting pickup height:

Next, let's adjust the heights of the pickups. The old classic method from the dawn of the electric guitar era was to take a US nickel 5 cent piece, place it between the high E string and its pole piece on the bridge pickup, and, while fretting that string on the last (21st) fret, adjust the pickup up or down until the nickel barely fits. Next, adjust the low side of the bridge pickup until both E strings are about the same in volume (or to taste), and then, adjust the neck pickup (of a Tele, or the other two pickups of a Strat), until all of the pickups have similar output, and you're done.

However, doing all that is fairly labor intensive, but there is a pickup height setting procedure that yields a tonal result that gets you 90% of the way there, in a lot less time: the metric method.

First, using a quality vintage German-made vernier caliper, let's measure a shiny, brand spanking new nickel:


Looks like almost exactly 1.9mm, close enough to 2mm, and that's good enough for setting the pickup heights the metric way, as follows:

Bridge pickup high E - 2.0mm, low E - 2.5mm
Middle pickup high E - 2.5mm, low E - 3.0mm
Neck pickup high E - 3.0mm, low E - 3.5mm

It's a great starting point, and often, no further adjustment is needed.


Plug in, play, and check how it sounds in all switch positions - good? Great, almost done. Not good? Then adjust to suit your own ears.

Check and adjust intonation:

Often, when changing from a floating tremolo bridge setup to a flat, non-floating trem, the string intonation settings will need to be readjusted; in this case an adjustment wasn't necessary, but it's a good idea to check it and adjust if needed. Also, whenever string gauge is changed on any guitar, intonation will need to be adjusted to suit the different sized strings. Here are the official Fender intonation instructions:

"Set the pickup switch to the Neck position. Set the volume and tone controls to maximum and tune the guitar. Check the intonation of each string with an electronic tuner by playing the open string harmonic at the 12th fret and comparing this note with the note produced by fretting the string at the 12th fret. The pitch should be the same + or - 1 cent (1/100th of a semitone). If the fretted note is sharp, the string must be lengthened by moving the saddle back; if the fretted note is flat the string must be shortened by moving the saddle forward. Turn the phillips screw on the end of the bridge clockwise to lengthen or counterclockwise to shorten. After each adjustment, retune and repeat this test until both notes produce the same pitch."

I'll add one thing to Fender's instructions: it's difficult or impossible to correctly do an intonation adjustment with old, worn strings, since the reason why old strings sound all wonky is due to whacked out harmonic content caused by irregular string vibration. Put on a new set first, make sure the windings are well seated at the tuning posts, re-tune, and then check and adjust.

If the intonation would have needed an adjustment, the string height should be checked one last time afterwards, and reset if necessary. Now that everything else is done, let's put on the new Allparts tortoise back plate:


Sure, there's a couple scratches on the black finish, but that's a really nice shiny 18 year old Fender.

That's it, we're done with a very basic Strat setup, and it's ready to rock out with. I have no doubt that a real professional guitar tech could do a better job of it overall, but - I'm just a home handyman and Neanderthal shade-tree mechanic kind of guy, and limited to what tools I have on hand in my cave, uh, garage workshop. Luckily, the methods I've used seem to work well, or well enough for rock and roll. The point is, if I can set up a Fender style guitar so that it plays well and sounds good, literally anyone else can, too.

*            *            *

A couple mornings from now, our son is going to jump down from his loft bed, and see these sitting in front of the small overstuffed sofa in his bedroom:


Besides the shiny "Black Tortoise" Strat, there's a made in USA Fender Bullet practice amp, and a TS-808 modded '90s Ibanez TS-5 Tube Screamer. Happy Birthday!

*            *            *

Update: Here's the Strat in action:


Wednesday Bach Blogging: Canadian Brass and Four Fugues


The Canadian Brass, at the 2012 Festival de Sion, in Sion, Switzerland, performing Johann Sebastian Bach's "Little" Fugue in G minor, BWV 578.

From some time in the 1980s, an earlier lineup of the Canadian Brass having some fun swinging a few bars of the Fugue #2 from Bach's Well Tempered Clavier Book 1:


One of J.S. Bach's most well known pieces, the Toccatta and Fugue in D minor, BWV 565, gets the Canadian Brass treatment in a 2009 concert video:


And if you have an hour or so, here's the original version of the Canadian Brass in an audio-only recording, of their transcription of one of J.S. Bach's last works, The Art of Fugue, BWV 1080:


My apologies - since finding and posting the above video, it appears that a few commercial ads have been stuck into the middle of this performance.  Kind of jarring and takes away from the beauty of the music, but it's a reminder that as ever, nothing is truly free of charge.

A final note - for everyone with so limited a musical vision that they cannot imagine the music of Johann Sebastian Bach being played in any fashion except for what they might consider to be "as Bach intended it to be", or something equally narrow minded, the Canadian Brass, among many others, show us that the ways in which Bach's work can be interpreted are limitless.

Daylight Savings Time


Spring forward. Fall down. Mass temporal hysteria. What a freakin' dumb ass idea.

Wake up, sheeple! 


1998 Fender MIM Strat Makeover, Part 1


    Recently, I picked up a nice condition 1998 Fender MIM (Made In Mexico) Standard Stratocaster. Actually, really really nice shape, almost like new, hardly a scratch, no fret wear; there were still traces of the plastic film overlay on the pickguard. I wasn't really in the market for another Strat, but when this was offered as part of a multi-item trade deal, I thought it might make a decent first electric guitar for our musically inclined son, so I went for it.

Strats and Teles have been around for more than 60 years, which means most of their history and lore predate the internet. In years past, this particular color combination - a black body with white pickguard - has had a few nicknames: "Tuxedo", "Black and White", and "Penguin", among others, but no one ever uses those terms anymore. I like penguins (who doesn't?), so we'll call this Strat the Penguin.

The Penguin style is possibly the single most iconic of all the Strat color combinations, and a lot of great music has been played on Fenders with this look. It's a great classic look, and we should probably just keep it the way it is, but oh well, that's not how we do things around here. We always mess around with our toys, until they look like something that belongs to us, and not someone else.

As soon as he heard I'd picked up the Penguin, David in Massachusetts suggested a style makeover, and sent a picture of what his dream Strat would have looked like during his own teenage years - a black body, rosewood fretboard, and a reddish brown tortoise pickguard:


Vary classy! A few days later David sent along a new Fender brand tortoise pickguard, and I ordered some Allparts cream colored pickup covers and knobs, and a tortoise trem cover. So now, let's get to work and make this happen.

First I'll say that although I have a workbench for the messier stuff I do, such as tube amp work (and rebuilding bikes), I like to do guitars on the kitchen table - there's an even, unshadowed northern light from the big sliding glass doors, and coffee and/or beer are a lot closer to hand. As usual, the big old pink towel goes over the antique '50s table, to protect both the guitar and the table, and family harmony as well.


This ain't going to be a Penguin much longer - first thing, after removing the strings, the woodscrews holding the pickguard to the body are removed, as are the machine screws holding the switch and pickups. Also, the nuts securing the potentiometers, or "pots", are loosened up with the correct tool, a Craftsman 13mm deep socket - more about that later. Now, all we have to do is lift off the 'guard, and everything else just sits there:


Here's a close up of the control area of the white pickguard; note the remains of the original transparent plastic film overlay:


Next, our new parts. While sometimes I "cheap out" when I do low-buck projects, it only makes sense when doing a makeover of an essentially new guitar, to get as high quality parts as possible. In this case, we can't go wrong with Fender and Allparts brand stuff:


Next, remove the old pickup covers, and place the new ones over the pickups. We'll take the new tortoise pickguard out of the bag; in the next picture, it still has the plastic film on it, and looks redder than it really is. Once we take that film off, the actual color is a bit browner. When guitars are assembled at the factory, the film is kept on, to reduce scratching both at the factory and also later at the music store. Today, we'll zip the film off right away, and use an old fashioned precautionary method to minimize scratches - working slowly and carefully.


I didn't take any pictures while fitting the pickups to the pickguard, mostly because it's a two-handed procedure. Also, everyone's got their favorite method, whether to flip the pickguard over and install the pickups down over it, or hold the pieces sideways, or to hold each pickup with the springs balanced in place and slip it into its respective hole, while starting the screws from the top by hand - that's the way I do it, but whatever works best for you, okay. In any case, be very, very cautious around the really thin pickup coil wires, between the coil itself and the solder joints - one slip, and it's time for a new pickup.

These pickups seemed to have larger diameter machine screws, and the Allparts vintage-spec covers had holes a bit too small, so it was necessary to ream them out slightly with an oval section hobby file. Just about 5 seconds of twirling the file gets it:


After installing the pickups, place the pots one by one into their holes, and tighten the nuts, first by hand, and then with the preferred tool - a shiny new-ish chrome plated Craftsman 13mm deep socket.  The nicely done plating on the socket reduces scratching, almost to none. Use no ratchet handle, just do it by hand - hold the socket lightly between your fingers, and at this point just get it barely snug:


Then, re-attach the switch. Before final tightening of the pot nuts, flip the pickguard over and check the alignment of the pots, so the wiring doesn't get pulled too tightly. Also, inspect the whole control section, including the solder joints; in this case, the black wire from the neck pickup pulled off its grounding point on the volume pot - an obvious cold solder joint, which had to be reattached. The tape holding the neck and middle pickup wires together also needed a re-wrap.


One thing I found out is that Fender obviously listened to everyone back in the '90s, when it was obvious that their Standard line MIM guitars had sub-standard electronics. My own '91 MIM Strat came from the factory with nasally, thin sounding pickups and cheesy pots and switch. By 1998, and possibly earlier, Fender was using decent quality CTS pots and CRL switches, and the ceramic magnet single coils in this particular Strat are very good sounding - sweet and full bodied, with a bright clear top end, and balanced lows and mids - really Hi-Fi.

In fact, Ron, the previous owner, had installed a Joe Barden pickup in the neck position, and took it back out soon afterwards, since it didn't sound as good as the stock pickup. I played this Strat both before and after the pickup swap, and again when the Barden was removed, and I totally agree with Ron. I could go on here about tone actually being in your fingers, and how a lot of players go insane, as well as lose a lot of cash, substituting pickups, bridges, and other parts, chasing after some mythical tone, but that's another story.

Here's a shot of the reattached pickup black wires at the volume pot, with a "hot" flowing solder joint:


Speaking of hot joints, marijuana became legalized recently here in Oregon, which I discovered when I joined a rock cover band. But I digress. Here's a picture showing the nice, large pickup cavities on this MIM body - a great idea, makes it easier to fit a humbucker or a P-90, and placing a loaded pickguard down over a body is a whole lot easier, without worrying about having every wire exactly in place. Also, that's some thick-ass paint in there:


Next, final tightening of the pot nuts. Remember, this isn't an auto engine, and nothing needs to get death-grip torqued, just snugged down; so hold the 13mm socket lightly, and when it starts slipping between your fingers, that's plenty tight enough.

Before putting all the pickguard screws back on, do a quick electrical test. I have a short jumper cable with a 1/4" plug on one end, and bare wires on the other, that the alligator clips on the probes of my ancient Sperry multi-meter can grab onto:


This time, everything's okay, hooray. If we had done any major replacement work, it's a good idea to put just one string on, plug the guitar into an amp, and make sure the volume and tone pots all work.  But in this case, since it was fine before, it should still be good. Is that being foolishly optimistic, or what?

So now, we can put all eleven of the pickguard screws back in. First, a couple of points: in the picture above showing the new package of knobs, you can see two wood screws at the top of the photo - these are special screws which have a wider diameter un-threaded shaft section between the head and the start of the threads. These go into specially enlarged holes at either side of the bridge, and help to locate the pickguard more exactly so the tremolo bridge plate doesn't bind against the edge of the 'guard. Not all Strats have this feature, but some do.

Also, make sure to run all the screws down only about 3/4 of the way at first, and wiggle the pickguard a bit so all the screws are equally mis-aligned. I say "mis-aligned" because whenever you change pickguards, no matter how high quality the part, the screw holes are never going to be in exactly the same location - so spread out the error, and that way none of the screws is going in sideways.

Final tightening: just like putting on an automobile tire, go around all the screws and tighten each a turn at a time. And remember, you don't need to tighten these screws a lot; you don't want to strip out the screw holes in the body, or deform the plastic material of the pickguard. Look closely at an attachment screw where it goes down through its hole - if you tighten too much, you'll see the plastic start to deform and dimple, and begin to create a divet. As time goes on, these stress points will turn into fractures - not a good thing. So, run each screw down to just barely snug with a thumb and one finger on the screwdriver, and then back off a 1/4 turn - you'll see that deformation disappear. And no, that pickguard ain't gonna fall off, unless... Uh, what exactly do you do with that Strat, anyway?

The next picture shows my big mistake - I was in too much of a hurry when I ordered, and got different color knobs and pickup covers. The knobs are "Cream", and the covers are "Vintage Cream", which has a small touch of greenish tint to it. I like that vintage cream color, so I've already ordered another set of knobs, and in a few days, we can see how it all looks when we're done.


In the meantime, here's a shot of the body as it sits right now. Not bad at all, and getting close to classy:


And here's where spending a bit more, and getting the correct part pays off. This is an 18 year old Fender Mexico Stratocaster, and the brand new USA pickguard was made by Fender as well - notice how precise the fit is, both around the tremolo plate, and at the neck. That's not a 22 fret neck with a fretboard overhang covering a sloppy fit - it's 21 frets, and the curve at the end of the neck matches the pickguard's curve very close to perfectly.

Depending on your browser, you can probably click or tap on the photo above to get a closer look.

Next time in Part 2, we'll put on the tortoise patterned trem cover and "vintage cream" knobs (as of this writing, they're still in the post, but should be here soon), adjust the pickup heights and general setup, then string this black and tortoise beauty up and take it for a spin.


Strat And Tele Pickguards - I Never Noticed That


    Over the years, I've owned a few Telecasters and Stratocasters.  And no, I'm not a "collector" or a dealer, just a player.  But in all this time, there hasn't been a couple of uninstalled pickguards laying around, until today.  And so I never noticed how gracefully their sensual looking curves fit together, side by side.  Amazing.


Thanks to David in Massachusetts for the really nice Fender Strat tortoise pickguard.

Cover Bands: Doing A Cover The Right Way, And Having Fun Doing It


    As Marty and Bobbi Culp (above) have proven, it's possible to do cover versions of popular songs in a way that best suits your own musical style, and also have a lot of fun doing them.

The title of this post may be "Doing a cover the right way...", but there isn't any right or wrong when it comes to music - as long as you're doing it, that's the only important thing.  When we're young, it can be instructive to emulate our heroes; singing their songs and playing their riffs over and over is a great way to get fluid on an instrument, and gain vocal technique.

It's when we stop trying to sound like someone else, that's when our own individual style automatically emerges - it's basic human nature, and it's a good thing.  Some people never stop trying to emulate others, and some players never even tried to; probably, all of the most creative and truly unique musicians and singers in musical history fall into the latter category.

Creating your own art is the most satisfying experience in life, period.  But, it's fun to do a cover every once in a while, and whether you do it exactly like the original version, or if you put your own personal creative spin on it, it's all the same, it's all good.  That is, as long as you don't get too obsessive about any aspect of it.  At the risk of sounding pedantic, or being a sensei, I'll just throw this out: trust your own instincts, believe in the song and believe in yourself, and remember to give back to the music, something from your own soul, as much as you've received from it.

In no particular order, here are a few examples of great cover versions; some are closer to the original recordings, and some are so far out in the cosmos that they're still orbiting some distant musical sun.

First, The Beatles performing the Isley Brothers' "Twist And Shout":


Here's the Grateful Dead, jamming on Buddy Holly's "Not Fade Away":


Jimi Hendix's "Purple Haze", as rocketed into the galaxy by the Kronos Quartet:


Matthew Sweet and Susanna Hoffs singing Neil Young's "Cinnamon Girl":


"Walk Away Renee", originally done by the Left Banke, as re-imagined by Linda Ronstadt and Ann Savoy:


Wilson Pickett, with (I never knew this before) Duane Allman on guitar, doing his rendition of The Beatles' "Hey Jude":


James Taylor's bittersweet social awareness ballad, "Millworker", totally slammed in a powerful performance by Bruce Springsteen:


                                                                 *            *            *

Part 1 of this series, "It's Only Rock And Roll, But Maybe Not".

And Part 2, "How I Joined A Cover Band, And Survived To Tell About It".